Imagine the frustration of needing crucial video evidence after an incident, only to find your dash cam footage blurry, corrupted, or worse – non-existent. Many drivers invest in a dash cam for peace of mind, but overlook the simple steps that ensure it’s always ready to perform. Just like any electronic device in your car, your dash cam requires regular attention to operate at its best. Neglecting maintenance can lead to unreliable recordings, reduced lifespan, and a compromised ability to capture critical moments on the road. This comprehensive guide provides you with an essential Dash Cam Maintenance Checklist, empowering you to keep your device in peak condition and ensure it’s a trustworthy witness on every journey.
Why a Dash Cam Maintenance Checklist is Crucial
Your dash cam isn’t just a gadget; it’s a vital eye on the road, offering protection against fraudulent claims, providing evidence in accidents, and recording unexpected events. However, consistent exposure to varying temperatures, vibrations, and constant recording cycles can take a toll. Without proper care, you risk blurry footage from a dirty lens, corrupted files from an overworked SD card, or even complete device failure. Following a routine maintenance checklist ensures crystal-clear recordings, extends the lifespan of your investment, and guarantees your dash cam is reliable when you need it most. It’s about safeguarding your peace of mind and preserving the integrity of your roadside evidence.
Your Step-by-Step Dash Cam Maintenance Checklist
Keeping your dash cam in top shape doesn’t require advanced technical skills, just a consistent routine. This checklist covers all the essential aspects, from basic cleaning to internal system checks, ensuring your device remains a reliable companion on every drive.
1. Keep Lenses and Body Pristine
A clean lens is paramount for clear video quality, while a clean body prevents dust and debris from affecting buttons or ports. Over time, dust, fingerprints, and smudges can accumulate, severely degrading footage.
Frequency:
- Lens: Weekly or bi-weekly, or after driving in dusty/rainy conditions.
- Body/Screen: Monthly.
Tools You’ll Need:
- A soft, lint-free microfiber cloth.
- Lens cleaner solution or 70%+ isopropyl alcohol (applied to cloth, not directly to the lens).
- A small air blower or soft brush for loose dust.
|
Our Picks for the Best Dash Cam in 2026
As an Amazon Associate I earn from qualifying purchases.
|
||
| Num | Product | Action |
|---|---|---|
| 1 | 4K+4K Dash Cam Front and Rear, Free 128GB Card Included, 5.8GHz WiFi Dash Camera for Cars, Built-in GPS, G-Sensor, 170°Wide Angle, 3" IPS Screen, 24H Parking Mode, Support 512GB Max |

|
| 2 | Dash Cam Front and Rear, 1080P Dash Camera for Cars, 3 Channel Car Camera Front Rear and Inside with 32GB Card, Loop Recording, Night Vision, HDR, 24Hr Parking, G-Sensor |
|
| 3 | WOLFBOX G840S 12" 4K Mirror Dash Cam Backup Camera, 5.8GHz WiFi Smart Rearview Mirror for Cars & Trucks, Front and Rear View Dual Cameras, Night Vision, Parking Assistance, Included 32GB Card & GPS |
|
| 4 | ROVE R2-4K DUAL Dash Cam Front and Rear, STARVIS 2 Sensor, FREE 128GB Card Included, 5G WiFi - up to 20MB/s Fastest Download Speed with App, 4K 2160P/FHD Dash Camera for Cars, 3" IPS, 24H Parking Mode |
|
| 5 | Dual 4K Dash Cam Front and Rear - Free 64G SD Card, 2160P+2160P UHD Dash Camera for Cars, Dashcam with 176°+160° Wide Angle, 3.5'' IPS Screen Dashcam, G-Sensor, WDR, Night Vision, 24H Parking Monitor |
|
| 6 | REDTIGER 4K Dash Cam Front Rear, STARVIS 2 Sensor, Free Card Included, 5.8GHz WiFi-20MB/s Fast Download, Dash Camera for Cars with GPS, WDR Night Vision, 170°Wide Angle, 24H Parking Mode(F7NP) |
|
| 7 | VIOFO A229 Plus Dash Cam Front and Rear, Dual STARVIS 2 Sensors, 2 Channel HDR, 1440P+1440P Voice Control Car Dash Camera, 5GHz Wi-Fi, Voice Control, Ultra-Precise GPS |
|
| 8 | Garmin Dash Cam™ Mini 3, Ultracompact 1080p HD Dash Cam with a 140-degree Field of View, Built in Clarity™ Polarizer, Voice Controlled, Automatic Recording |
|
| 9 | 4K Dash Cam Front, Built-in 5G WiFi, 64GB Card Included, Dash Camera for Cars, Mini Dashcam with Super Night Vision, Loop Recording, G-Sensor, 24 Hours Parking Monitor, Support 256GB Max |
|
| 10 | Dash Cam Front and Rear, 2.5K Dual Dash Camera for Cars, 2560P Mini Car Camera, 2 inch IPS Screen, 32GB Card Included, WDR Night Vision, 24 Hours Parking Monitor, G-Sensor, Support 256 GB Max |
|
Step-by-Step Cleaning Process:
- Power Down: Always turn off and unplug your dash cam before cleaning to prevent accidental damage or setting changes.
- Remove Loose Debris: Use an air blower or soft brush to gently remove any loose dust or dirt from the lens and surrounding body. This prevents scratching during wiping.
- Clean the Lens: Lightly dampen a corner of your microfiber cloth with lens cleaner or isopropyl alcohol. Gently wipe the lens in small, circular motions, starting from the center and moving outwards. Avoid harsh chemicals like window cleaner, which can damage lens coatings.
- Wipe the Body and Screen: Use another clean, dry section of the microfiber cloth to wipe down the dash cam’s body and screen, removing fingerprints and smudges.
- Dry: Use a dry part of your microfiber cloth to ensure no moisture is left on the lens or body, leaving a clear, streak-free surface.
> “The simplest maintenance step – keeping your dash cam’s lens spotless – is often the most overlooked, yet it directly impacts the clarity of every crucial second it records.” – Dashcamon Admin, Automotive Technology Specialist
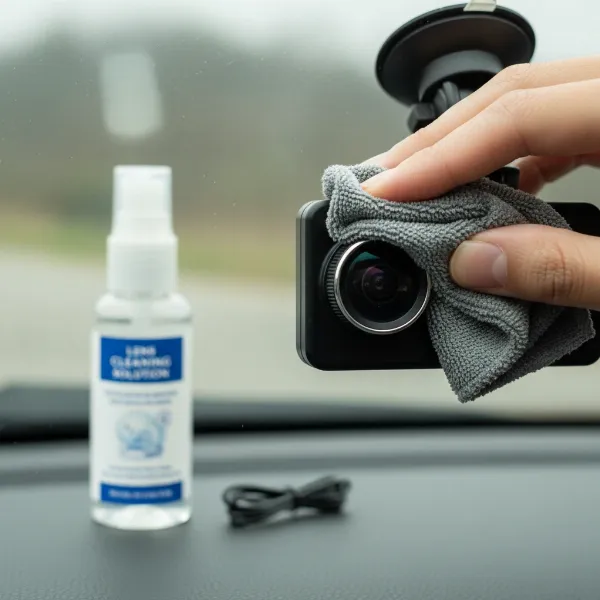 A hand gently cleaning a dash cam lens with a microfiber cloth and lens cleaner, ensuring clear footage
2. Optimizing Your SD Card’s Performance
The SD card is the heart of your dash cam’s recording system. Constant overwriting of data wears it out, and improper management can lead to file corruption and recording failures.
Frequency:
- Format: Monthly for optimal performance and to prevent data corruption.
- Replace: Every 6-12 months, depending on usage and card type (high-endurance cards last longer).
Guidelines:
- Format In-Camera: Always format your SD card using the dash cam’s menu settings. Formatting on a computer, especially for larger cards (64GB+), can default to file systems (like exFAT) that your dash cam may not recognize, leading to errors. Dash cams typically require FAT32.
- Use High-Endurance Cards: Invest in “high-endurance” microSD cards specifically designed for continuous write/rewrite cycles found in dash cams. Brands like Samsung Pro Endurance, SanDisk High Endurance, or Lexar High Endurance are recommended.
- Check Capacity: Ensure your SD card has sufficient capacity for your recording needs and that loop recording is functioning correctly to overwrite old files.
- Monitor for Errors: If you notice skipped recordings, freezing, or error messages, your SD card might be failing and should be replaced immediately.
3. Stay Current with Firmware Updates
Firmware is the operating system of your dash cam. Manufacturers regularly release updates to improve performance, fix bugs, add new features, and enhance stability.
Frequency:
- Check: Every 1-3 months.
- Apply: Promptly when available.
Process:
- Visit Manufacturer’s Website: Regularly check your dash cam manufacturer’s official support page for the latest firmware versions for your specific model.
- Download and Install: Follow the manufacturer’s instructions precisely for downloading and installing the firmware update onto your SD card, and then into the dash cam. This usually involves placing the firmware file on the root directory of a freshly formatted SD card and inserting it into the dash cam.
- Benefits: Updated firmware can resolve recording glitches, improve image processing, enhance G-sensor accuracy, and ensure compatibility with newer features or accessories.
 A dash cam screen displaying a firmware update in progress, symbolizing improved performance
4. Ensure Secure Mounting and Power Integrity
A loosely mounted dash cam can lead to shaky footage and potential dislodgement, while faulty cables can interrupt power and recording.
Frequency:
- Mount: Monthly, or if you notice any vibrations or movement.
- Cables: Quarterly, or if you experience power interruptions.
Checklist:
- Mount Stability: Gently test your dash cam’s mount to ensure it’s firmly attached to the windshield or dashboard. Tighten any screws or re-secure suction cups/adhesive as needed. Vibrations from a loose mount can cause blurry video or even damage the device.
- Cable Inspection: Visually inspect all power and data cables for any signs of wear, fraying, cuts, or pinched areas. Damaged cables can lead to intermittent power, recording failures, or even electrical hazards.
- Secure Connections: Ensure all cable connections (to the dash cam, power source, and any rear cameras) are snug and fully seated. Loose connections are a common cause of unexpected shutdowns.
- Power Supply: Verify that your dash cam is receiving adequate power. USB ports in cars or computers often provide only 0.5A, while most dash cams require at least 1.5A. Always use the manufacturer-supplied power adapter (cigarette lighter or hardwire kit) for reliable operation.
5. Review and Refine Camera Settings
Incorrect or outdated settings can prevent your dash cam from capturing the best possible footage or operating efficiently.
Frequency:
- Review: Quarterly, or after a firmware update or any significant temperature change.
Key Settings to Check:
- Recording Resolution & Frame Rate: Ensure it’s set to the highest quality your SD card and storage capacity can comfortably handle (e.g., 1080p at 30fps or 60fps, 2K, 4K).
- Loop Recording: Confirm this essential feature is enabled, allowing the dash cam to continuously record by overwriting the oldest non-locked files.
- G-Sensor Sensitivity: Adjust the G-sensor (impact detection) sensitivity. If it’s too high, it will lock too many unnecessary files due to bumps; if too low, it might miss actual impacts.
- Date and Time: Verify that the date and time are accurate. This is crucial for evidence, and an accurate GPS lock typically updates this automatically.
- Parking Mode Settings: If your dash cam has parking mode, ensure its settings (e.g., motion detection sensitivity, recording duration) are configured to your preference.
6. Protect Your Dash Cam from the Elements
Dash cams are built to withstand car environments, but prolonged exposure to extremes can shorten their lifespan.
Frequency:
- Consideration: Daily, or when parking for extended periods.
Protective Measures:
- Extreme Temperatures: Avoid leaving your dash cam in direct sunlight on hot days for extended periods. High heat can degrade internal components, batteries (if applicable), and adhesive mounts. Conversely, extreme cold can also affect performance. Consider removing the dash cam or using a sunshade if parking in direct sunlight in hot climates.
- Humidity: While most dash cams are sealed, excessive humidity can lead to condensation. Ensure your car’s interior is reasonably dry.
- Parking Smart: Whenever possible, park in shaded areas or use a windshield sunshade. This reduces direct sun exposure and helps regulate interior car temperatures. Some dash cams offer a low-power parking mode that minimizes heat generation when the car is off.
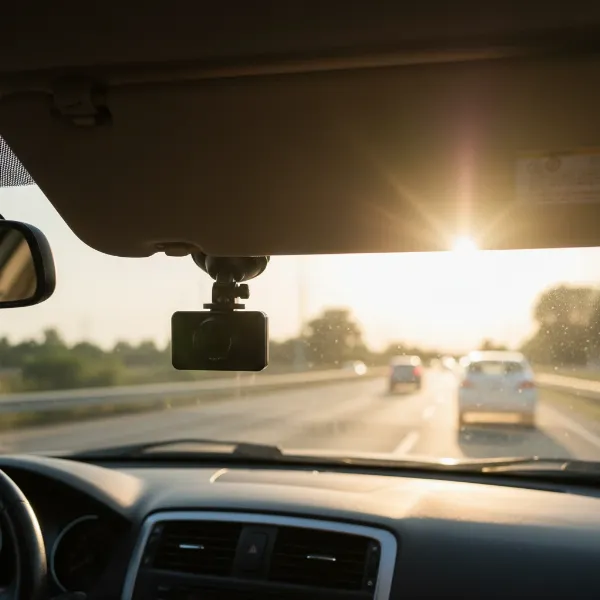 A dash cam partially shaded by a car's sun visor, illustrating protection from extreme heat
7. Regular System Checks and Basic Troubleshooting
Proactive checks can catch minor issues before they become major problems. Knowing basic troubleshooting steps can save you a trip to a technician.
Frequency:
- System Test: Weekly or monthly.
- Troubleshooting: As needed.
Checklist:
- Routine Recording Test: Periodically review a few minutes of recorded footage to confirm video quality, sound recording, and accurate timestamps. This ensures the camera is actively capturing what it should.
- Power Cycle: If your dash cam seems unresponsive or glitchy, try a simple power cycle: unplug it, wait 30 seconds, and plug it back in.
- Factory Reset: If you’re experiencing persistent issues that aren’t resolved by other steps, a factory reset (found in the dash cam’s menu) can often clear software glitches by reverting all settings to their defaults. Remember to back up any important files first.
- Consult the Manual: Your dash cam’s user manual is an invaluable resource for specific troubleshooting steps and understanding unique features.
- Check for Physical Damage: Regularly inspect the dash cam for any cracks, loose parts, or signs of impact that might compromise its function.
Extending Your Dash Cam’s Lifespan
By diligently following this dash cam maintenance checklist, you’re not just performing routine tasks; you’re actively investing in the longevity and reliability of your device. Clean lenses ensure clear evidence, properly managed SD cards prevent data loss, and updated firmware keeps your technology performing optimally. Proactive care minimizes the chances of critical moments being missed and saves you from the frustration of a malfunctioning dash cam. Take these steps regularly, and your dash cam will continue to be a dependable silent witness on every mile of your journey.
Frequently Asked Questions
How often should I format my dash cam’s SD card?
It’s highly recommended to format your dash cam’s SD card at least once a month. This practice helps to maintain its health, prevent file corruption, and ensure consistent recording performance, especially given the continuous write-and-overwrite cycles it undergoes.
Can I use any SD card in my dash cam?
No, it’s best to use “high-endurance” microSD cards specifically designed for dash cams. These cards are built to withstand the constant recording and high temperatures typical of dash cam use, offering greater reliability and a longer lifespan than standard consumer-grade SD cards.
What should I do if my dash cam footage is blurry even after cleaning the lens?
If your footage remains blurry after a thorough lens cleaning, check for potential internal condensation, scratches on the lens itself, or glare from your windshield. In some cases, a protective film or internal component damage could be the cause, requiring further inspection or professional advice.
How often should I check for dash cam firmware updates?
You should check for firmware updates on your dash cam manufacturer’s website every 1 to 3 months. Regular updates can introduce performance enhancements, fix known bugs, and ensure your device remains compatible with new features or security protocols.
Is it safe to leave my dash cam in the car during extreme weather?
While dash cams are designed for automotive environments, prolonged exposure to extreme heat (direct sunlight) or severe cold can degrade internal components and affect battery/capacitor life. Consider removing the Dash Cam or using a sunshade during extended periods of intense weather to prolong its lifespan.
My dash cam keeps shutting off randomly. What could be the cause?
Random shutdowns often point to power supply issues or a failing SD card. First, check all cable connections for looseness or damage. Ensure you are using the correct power adapter. If the problem persists, try formatting or replacing your SD card, as corruption or a worn-out card can cause instability.